Started working more on the pipes tool more. I had an earlier version that had similar functionality. This one added material switching and different construction types. UV scale is on the model and not the material. It can be changed to the material if needed. I'll write it up more on a separate blog post.
Glen Debello
Senior Technical Artist at Black Forest Games
Pipes - Tool The beginning stages.
General / 12 February 2020
A new pipes tool in the works for Unreal. More to follow.

Green pipes. I played a lot of Super Mario Bros. I always default to green.

Simple base network for the pipes. It will be expanded more as I add more features.
vertex painting and terrain snapping doodle.
General / 11 February 2020
Testing out some vertex painting in Unreal. Ground asset is just for testing various assets that use terrain snapping. It has different noises applied for ground height and terrain deformations.
Fence was based on the Indie Pixel fence, I added terrain snapping to the fence. This was made using a Raycast on the initial curve with an Object Merge that allows for asset, geometry or landscape asset.
Based on an older asset that uses terrain snapping. This asset also uses a Skin node to create the chain link portion. May change it to sweep to allow for better UV creation.
Sera Defense Technical Development
General / 01 April 2019

I guess this has become a development blog for Sera Defense. It's an indie game that is in development with Gator Dog Games. Very small indie studio. Link to splash page: https://www.seradefense-game.com/
Until the website launches, this would be the main source of info from my part.
The future Technical Development has several features planned. Besides developing world tools for the artists, I create a lot of VFX! These features range from VFX to Water to Game Aesthetics (Footprints) and interactive Grass.
What's next for the development blog, explosions. Lots and lots of explosions. Ground explosions, air explosions, side of cliff explosions, side of building explosions, and tower explosions.
How does one achieve these explosions? Through lots of research, maths (maths is really fun for me!), and Houdini. Well I could use other software, I just like using Houdini at the moment. So much fun!
Ok, back to VFX and explosions. There are several key components for the ground, side and air explosions.
1. Base Explosion - The main component of the explosion. How big is the explosion? Is it a big explosion or a small explosion? Do I need two different types of explosions? Yes, I do. I need at least three explosions. One for the ground, another for the sky and another that is on the side of cliff or building.
2. Smoke - There will be smoke that rises from the explosion. This is separate than the Smoke sim.
3. Debris - This can be rocks, wood, parts of the ground that is propelled from the explosion.
4. Blast wave - Explosions have Blast Waves that expand outward from the core.
5. Negative Pressure system - After the Blast Wave there is negative pressure which sucks everything back towards the center.
Using these components separately, I can then build different explosions in Unreal.
Next posting will be one of the final explosions with a write up of how we accomplished the explosion.
Rope Bridge Digital Asset - Complete
General / 31 March 2019
Finished the Rope Bridge Digital Asset. I included various parameters that allows custom geometry and a tile texture for the rope. UVs are automatically set for the rope and the knots on the rope.
Since our level has lots canyons, we have a lot of bridges that need to be placed quickly. I created this tool to give the user control over the look and placement of the asset. All the geometry is proxy geometry and has inputs for final geo and textures.
The node network has 5 major components.
1. Establishing control of the drape. The drape function had to be controllable and easily applied to the curves that control the planks, and the curves that control the ropes.
2. Connecting the two ends to allow for planks that do not move. These planks needed to be on two separate curves that would be on the ground and not hang over the edge.
3. Establish the vertical ropes with a connecting rope under the planks that form a U Shape. The user needs to have the ability to control the spacing between the ropes.
4. Create the support posts on either end with user control over spacing and height.
5. Add user controlled random rotation to the planks.
These were some of the 5 major components that were planned during the development of the Rope Bridge.


Rope Bridge Digital Asset Update
General / 29 March 2019
Started developing the Rope Bridge more today. This is a tool for the level designers. The ability to move the cure and have the Rope Bridge follow is a nice time saver. Figured out how to keep the planks from bunching up at the end of the drape and created an area for support posts on either end. Once that was finished, I had to sidetrack and create a nice ground material in substance. So, most of my day has been spent creating a ground texture in Substance.
Here is something to show you what the bridge can accomplish.


Rope Bridge Digital Asset - Houdini to Unreal
General / 28 March 2019
Continuing with my level design tools, this one is an asset for one of our levels. Once this tool is finished, the next several posts will be about our Custom Materials, and FX Sims from Houdini to Unreal.
Currently working on a Rope Bridge for our environment at work. So far, my job is really friendly with posting our creations. A really small Indie studio that needs to be as efficient as possible with our work. This asset is for one of our environments. Looking at the other posts, you may have guessed that one of our levels has a lot of water, cliffs, and canyons.
Here is what the Rope Bridge looks like in Houdini. Working on the base form at the moment. This is our grey box asset that we are using for game design. It has the base options of setting the number of planks and how far the bridge drapes.
Mental Note: Don't use Point SOP.

Here are the parameters for the Rope Bridge so far. It has two inputs and three functions.
- The first input is creating the curve that the Rope Bridge follows.
- The second input allows for a custom plank geo.
- The first function is Bridge Intervals. This allows the bridge to have multiple points with a platform.
- The second function is the Plank Amount. This set the number of planks in the Rope Bridge. This may be automated in the future to match the size of custom plank geometry. This way, the artist doesn't have to manually set the planks every time. It should automatically update. Future request though.
- The third function is the Drape amount. How far does the artist make the Rope Bridge drape? Will the Drape in the Rope Bridge go more towards the lower end? Physics? Right now it is basic, working on more advance draping at the moment.

Screen shot of the Rope Bridge in Unreal.

More to follow as development continues.
Landscape River Tool - Water Flow Maps Digital Asset
General / 27 March 2019
One of the levels that I am working on has lots of water. Creating water flow maps quickly has been the biggest challenge for us. One of the main reasons we moved from Unity to Unreal. The ease and control of water flow maps. and sculpting the terrain with rivers has been the best part. With this tool, I am able to carve a terrain with the river tool, isolate that section, create the flow maps from that section and export the created flow maps to Unreal. I can also re-export the terrain into Unreal to match the updated terrain. I also work on a very small team that needs a lot of flexibility.
A couple of things are accomplished.
Part 1. River Landscape Tool - gd_riverflow tool
Part 2. Water Flow Maps - gd_flowmaps tool
Part 33. Export Heightmaps - Each asset has the ability to export heightmaps.
Mental Note: Don't use the Point SOP.
1. River Landscape Tool
Starting out with the Inputs, they are very similar to the Slope Landscape tool that was created. 3 types of inputs, Houdini Terrain, Heightfield, and an External Terrain Mesh for modification. I use a simple expression on my switch node that automatically detects what I am bringing in to my network. There are other ways, this is just one way. In the switch node I use:
nprims("../heightfield_project2/")>0 The top switch, in this network looks for a Houdini Terrain at first. When a terrain is not connected and a Heightfield is input, the Switch automatically switches to the Heightfield. At the same time, I like to put a Null at the end of the network when I am finished.

The Attribute Wrangle at the end of the Inputs network sets the prim color to Black.
// Easy way to set color to Black
@Cd = 0;

Starting with the left side, this creates the width of the river. I created an attribute for my river flow map uvs. I called it uv_set. With a value of $PT. This is needed later for exporting the flow map mesh with proper UVs. Better to do it now, than later. The null marks the end of the network for the line that controls the width. The curve input uv texture node is set, to Rows and Columns, Point Attribute Class, -1 offset and Angle is set to 90. This gives us proper UVs.

The river width is controlled through the null called Scale Ramp. This is Ramp (float), and is linked to the sweep node.

Everything is the same as the Slope Landscape Tool, with the exception of the Ray_VEX node.
This time I created a group after the Rays hit, this allows me to isolate the rays later on. For this purpose I called it the BLAH_grp.
vector hitDir = chv("Ray_Hit");
vector hitPoint;
vector uvw;


int primNum = intersect(1, @P, hitDir, hitPoint, uvw);


if(primNum >= 0)
{
    @P = hitPoint;
    //@N = prim(1,"N", primNum);
    i@group_BLAH_grp=1;
    @Cd = {0,0,1};

}
Here are my exports and output node. I recommend using an Output node over a Null.

I can then export the map and meshes that are needed for Flow Maps.

Part 2, gd_flowmaps tool write up coming soon!
Slope Landscape Tool - Houdini Digital Asset
General / 26 March 2019
I was asked to create a terrain modifier tool that can mimic the Slope Landscape Tool in Unreal. They wanted to take an existing heightmap from World Machine, Houdini, Unreal, Unity, etc, and modify it in either Houdini or Maya. This gave them the ability to design different areas of the map and then export the heightfield back to Unreal.
You can input three different types of terrains. A heightfield, geometry and Houdini terrain. There are options to set the density, height and size of the terrain to match your inputs. The path options give you the ability to set a custom width for your path, create intermediate levels, and curve around the existing the terrain. *This part is needed since there are a lot of walkways along cliffs in our game.
We discovered later on that these landscapes were a bit heavy on the computer. The tool was reworked to only affect the area needed and then subdivide the area after it was finished. This gave us clean and crisp heightmaps.
Another option is the ability to bake vertex colors in the of the new slope to assign the correct material in Unreal.
The last tab in the asset is the ability to export the various heightmaps.
While this tool seems very simple, it really helped with level design and getting assets in the right area. We are a very small team of 6 at the moment and try to keep everything as easy as possible.
A couple of notes: Don't use a Point SOP, it is not multi-threaded. Use an Attribute Wrangle, it is multi-threaded.
Here are my terrain inputs, marked in Blue. I cannot stress enough what a clean network will do for later on in development. It is very difficult getting another digital asset with nothing commented, colored, or organized. It can be messy at times.

Here are my inputs for for the curve. The width of the slope is controlled with the length of the line. Input is marked in Blue, the same as the terrain inputs. I also have some options set to resample the curve if needed. The polyframe is used to set the normals of each point.

This is where we have fun. We set an initial color for the terrain with an Attribute Wrangle. Mental Note: Do not use a Point SOP. The lazy way of setting the terrain to black.


Setting the curve mesh color is a bit different and yet still simple. This will set it to Red. This is important later on, since we are also going to a group based on this color. We can then isolate that area and make more modifications.

I connect the two with an Attribute Transfer. The Cd value is added to the Primitives and everything else is unchecked. The Conditions is linked to the Line width, this will give an accurate representation of the line Cd.

Of course, we want to add more detail to the modified area. We do this with a subdivide node and then use a smooth node. For efficiency, we don't want to subdivide the entire mesh, just the area we modified. In the end it is not the mesh that is getting exported, just a new heightfield. For that we use another Attribute Wrangle, which I called group_by_color.
If the Color Red is greater than 0.1, then create a group called modifiedMesh_grp.
if (@Cd.r > 0.1)
{
    i@group_modifiedMesh_grp=1;
}
A new group is created called modifiedMesh_grp. We test this by using a Blast node and seeing if the group disappears.

Yay! The group is visible. Mental Note: Don't use Point Sop! Ok, moving forward.
After our Attribute Wrangle group_by_color, I connect an attribute wrangle to essentially handle my Rays. Using VEX in an Attribute Wrangle, and not a Ray SOP. We set the following VEX Expression.
vector hitDir = chv("Ray_Hit");
vector hitPoint;
vector uvw;

int primNum = intersect(1, @P, hitDir, hitPoint, uvw);

if(primNum >= 0)
{
    @P = hitPoint;
    //@N = prim(1, "N", primNum);
    @Cd = {1,0,0}
}
Don't forget to create the spare parameter that we created in the first line. chv=("Ray_Hit"). This also depends on your map height as well. I ended up linking my Ray_Hit Height in Y to the heightscale of the terrain map with a percentage.
ch("../heightfield_file1/heightscale")+90/100This gives me a final number of 90.9.
After the Ray VEX Attribute Wrangle Ray_Out I subdivided the mesh using the group we created earlier. In my assets I like to add comments in the Nodes that have a specific group. The subdivided and smooth node both use the modifiedMesh_grp. This can be added in the comment section of the node. Don't forget to select Show Comment in Network.

The final asset.


Terrain imported via heightfield

Slope added

Cd value to show modified area.
Part 2 will cover How to Export maps from your digital asset. Mental Note: Don't use the Point SOP.
Terrain Scatter HDA - WIP
General / 27 November 2018
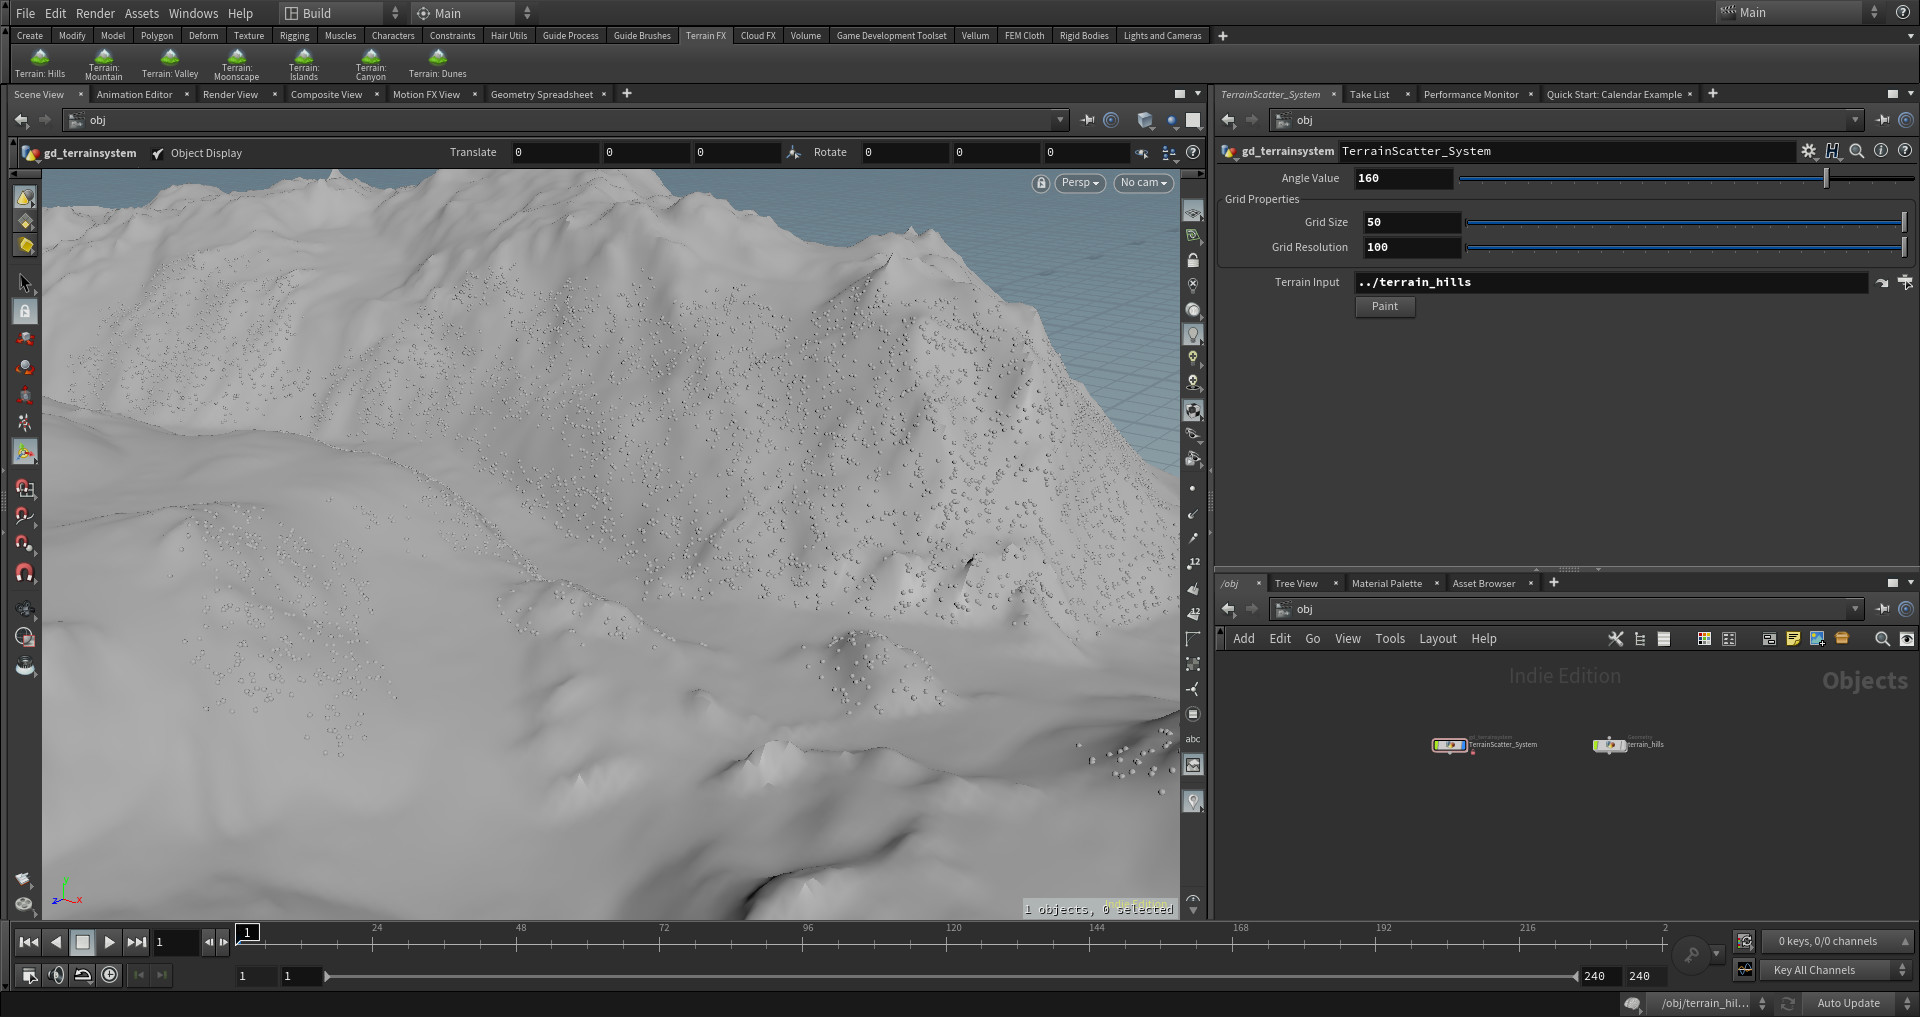
Developed a terrain painter a while ago. It used a form of copy stamping that was really slow. I decided to make an update to the terrain painter using VEX. This tool will allow environment artists to scatter vegetation through out the area based on slope angle and decay around objects in engine. I will post updates to the scene on the blog posting as I progress further.
The goal is to have Random rotations, orient to normal, optional on/off scaling, and decay.